| Website favicons |
What is a favicon?
Favicon as a favourite icon or website icon.It is shown in the tabs of a browser or in the bookmarks whenever someone bookmarks your website.Without favicon, more it does not look good and makes it difficult for the users to find your site inside their bookmarks collection.It is like an identity of your website.The examples of favicon are given in the main picture above.Best website icon size:
I recommend the website icon size of 64px by 64px.This will improve the quality of your favicon and will make it clearer to look at.
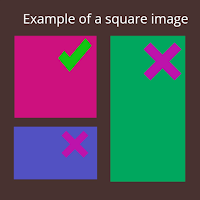
What is a square image?
An image whose width and height are equal is called a square image.Following picture shows the example of what sizes of image should be used.Example:
 |
| correct favicon size |
How to make favicon?
The question i mostly hear is,"how do you create an icon for a website"?It is very easy to create it.Following are the steps required to create a favicon for your website.
- Make a graphic that is unique and is relevant to your site.You can make it using an image editor or graphic software such as paint, adobe photoshop, adobe illustrator, gimp e.t.c.
- Make sure it is a square image.
- Convert your final image to .ico format (.ico format is required for an image to be a favicon).
- Upload the .ico file to your blog or website.
How to create favicon in photoshop?
It's really simple to make a favicon in photoshop.Now, why use photoshop to make a favicon image?Because it's a high quality software that will give you great results in making a favicon for your website.
Steps to make favicon in adobe photoshop:
- Open up photoshop and make a new project
- Keep the canvas size of your project as squared.I recommend width and height of 64 and 64 pixels respectively
- Now use the desired tools to make your favicon image in photoshop.
- Save it as jpeg or png (recommended)
How to make favicon in illustrator?
How to create favicon in paint (for beginners)?
Everyone knows how to draw in microsoft paint.You can use it to make a favicon for blog whether it's blogger or wordpress.The good thing is, it's easy to use.I, however, recommend this only for newbies who don't have any experience in graphics designing.The steps are also same as above mentioned tools's.Always make sure to make a square image.
How to create favicon in HTML?
I don't really recommend this option if you are a beginner and can add favicon with other easier ways.But on some websites, you have to add it in the html code.Here are the steps.- Upload your favicon file to your website.
- Add this code to your website html : <link rel="shortcut icon" href="favicon.ico" type="image/x-icon">
- Remember to best this code just after the starting <head> tag.
How to convert image to .ico file?
To convert your image to .ico file, you will need a .ico generator also called favicon generator.There are a lot of favicon .ico generators available online but only a few of them work well and don't ask for a sign up before you create your favicon.ico file.I have given the link for best favicon.ico generator in the paragraph below.
Best favicon generator:
The best .ico generator in my opinion is Favicon generator by dynamic drive.It is very easy to use and will convert your image to .ico file for free.You will not need to sign up for this site.All you have to do is to choose your favicon image and download it after it converts that image to .ico file.You can also make favicon image using this tool.
How to add favicon to your site/blog?
Now after you have created your favicon, it's time to upload or add it to your blog or website.Here i will mention only two platforms, Blogger and Wordpress.The procedure for other sites is almost the same.
How to change/add favicon to blogger?
Follow these steps to change the the favicon in blogger.
- Go to your blogger blog's dashboard.
- Click on the layout button on the left hand pannel
- Click edit button located inside the favicon box.
- Click on chose file.
- Look for your .ico file in the place where you kept it and select it to open it.
- Click save.
How to change the favicon in wordpress?
You can use "wordpress favicon plugins" for this.It is relatively easy to add favicon to wordpress.The best plugin for .ico wordpress is "All in one favicon".To install this .ico wordpress plugin,
- Go to your wordpress dashboard.
- Click on plugins at the left panel.
- Click add new button located at the top of the page, next to "plugins".
- Search for "All in one favicon" and install it.
- Click on activate plugin.
- Move your mouse over settings option in the left panel and click on All in one favicon.
- In All in one favicon settings, click on upload in .ico framework option
- choose your .ico file and save.
- Now refresh your wordpress site to see changes.
New favicon is not changed/appearing
Is your new favicon not appearing in the tabs or bookmarks and you see the old favicon?Or, you think your favicon has not been changed?If so, then don't worry.It will start appearing.The problem is in your browser.Clear your browser cache or use another browser and check if it works.
Comments
Post a Comment